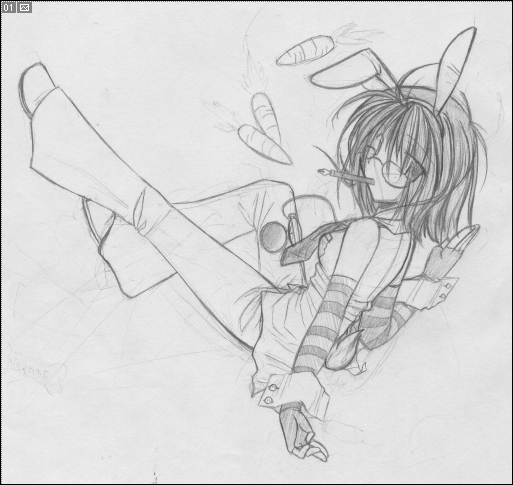
Let's prepare the image. Scan your image first. Go to File>Import>(Scanning Program here). Preview the scan. Setting up the scan is all up to you. Do it whichever way you like. Hit your Scan button and the image should be imported into Adobe.
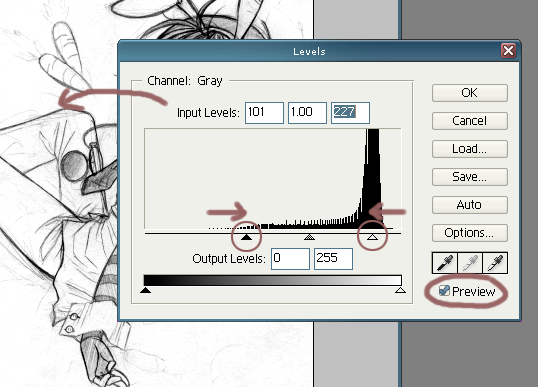
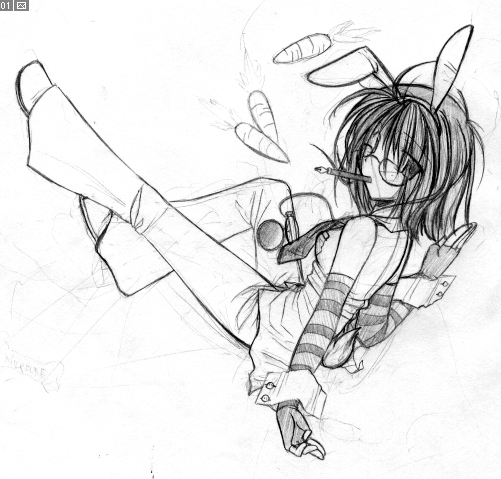
At this point, since my scanner isn't the best in the world, my sketches tend to be really obscure and gray. In this case, go to Image>Adjustments>Levels (the shortcut key is Ctrl+L). The Levels window will pop up. Make sure 'Preview' is checked. Move the far left arrow to the right. This'll darken your lines. Move the far right arrow to the left. This will wash-out most of the gray. Click OK and your image will be set. (click for image)
You can approach the next step whichever way you want. I know a lot of artists that make really clean lines with their sketch or ink by hand and simply erase the rest of the junk away. Again, it's all up to you. Make do with whatever style fits you best. For those of you that want to use your own way of cleaning, skip this part and move onto Step 03. Those that want to read my technique can read on. I tend to be really wild and messy with my sketches, so they often come out messy, so I prefer inking digitally with the Pen tool.
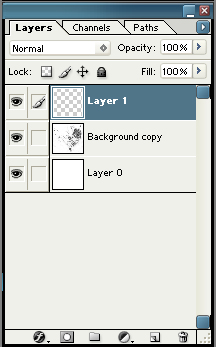
Make sure your Layers window is open (if it isn't, just go to Window>Layers). First, double-click on your sketch, then click Okay on the window that pops up to unlock it.
Create two more layers. Place one layer underneath your sketch layer and fill it with white. Place the other layer on top of your sketch layer. The top-most layer will be your 'lineart' layer. Lower the opacity of your 'sketch' layer for now. (click for image)
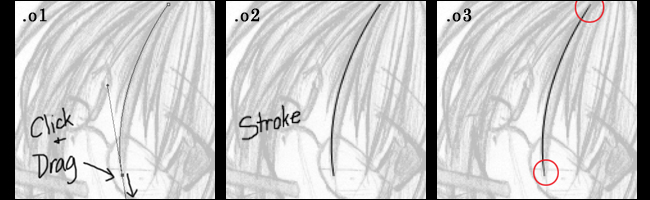
Okay, now make sure your 'lineart' layer is highlighted. Also, make sure your current Brush setting is at a 1-pixel hard brush setting. We'll start with the hair. Take your Pen tool and click on one end of a strand of hair. Then click and drag on the other end of the strand of hair until it lines up with the sketch. Right click and select Stroke Path.... Another window should pop up. Select the Brush option from the drop down menu and then click Okay. A black line should be stroked in now.
You'll notice the line is a bit...fat. You usually want thin, taped strokes for your lines, so select the Eraser tool and thin the line down. Rinse and repeat. Remember to vary widths as well. (click for image)
Note: This step WILL take some time, depending on how large your picture is, or how much detail is in it. Be patient. Once you practice with the pen tool enough, the results are rewarding.
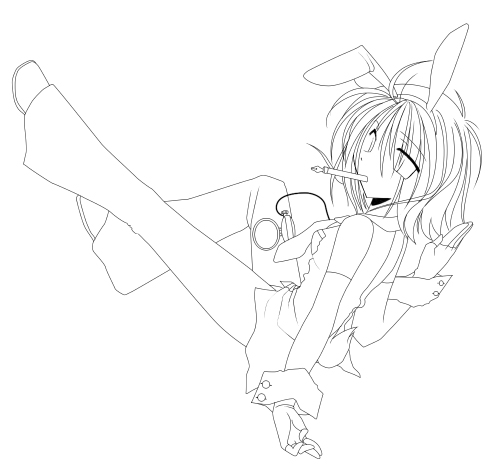
Once you're done, you should have something like this. Delete the sketch layer, unless you need it for future reference, but otherwise, you're done with it. Onto Step o3!
move onto step .o3 >>